Website sections
Editor's Choice:
- Guest houses for the new year
- Eye of the planet information and analytical portal
- All about Brezhnevka: panel houses
- Dacha Kichkine in Crimea: photos, how to get, reviews of tourists, hotel and sanatorium
- The most common layouts of apartments in typical houses in Russia
- Redevelopment Project Standards
- The last days of the Romanovs in Crimea
- Palace cottage alexandria
- Coordination of the demolition of the wall: what documents are needed
- Classic bedroom for men
Advertising
| What are the names of volumetric paintings from paper. DIY fabric paintings: volumetric and other types of paintings to create coziness and decorate your interior |
|
Fabric pictures are practical. This is an opportunity to create your own masterpiece at minimal cost. Of course, you should not use completely cheap fabrics because of the quality of the material, which can deteriorate (wipe, tear) right during the painting. See what marvelous prints modern fabric manufacturers offer. Fabric pictures are easy. The only thing you will need when making paintings from fabric is a lot of patience. In general, the matter is simple and depends on your imagination. If you have more practice, you can make pictures in 2-3 hours. Who knows, maybe you have talent, and you will start selling them?
So, you decided to make your first tissue picture. First of all, you need to decide what materials and tools we will use. Choosing materials and tools First you need to choose the material for the frame or subframe. The two most common options are wood and foam. Wooden frames have a more even surface. The fabric on them holds more evenly due to hardness.
As for the foam, then there will not be a need for a frame at all. Pictures on polystyrene foam are made of fabric by pressing it into a soft surface.
Next - select the fabric. It all depends on your idea and imagination. But you need to take into account, for example, that the volume of fabric for a wooden frame should be slightly larger than its size (recommended, prepare a size 7 cm larger) When you are in a textile store, pay attention to various textile prints. Many of them are so self-sufficient and beautiful that they can claim the role of a full-fledged subject of art. It is not surprising that successful designers and decorators use fabric paintings in their work. To create a picture of fabric you will need: Reiki for the frame (you can also buy finished); We start to create! You can’t imagine how much pleasure the creation of a picture made of fabric can bring: the master class that we offer can become an instruction for creating a real masterpiece. So, let's begin. Create a frame. We connect two planks of wood with screws. For higher strength, it is better to use two self-tapping screws per connection. Iron the fabric. A well-steamed and ironed fabric will ensure the quality of the product: there will be no swelling and other irregularities. We place the fabric on the frame with the wrong side, put the frame on top of the material. Leave at least 7 cm on each side (this distance depends on the thickness of the subframe). Then the excess part of the fabric with a pattern should be cut off.
Pull the fabric on the frame so that its fasteners are not visible. After everything is fixed, we will need a staple gun. Nailing the fabric to the tree with staples, remember that you need to stretch the fabric so that there are no “bubbles” in the picture.
The picture is ready!
Styrofoam paintings To create pictures of fabric on polystyrene, a wooden frame is not required. You use polystyrene foam, along the contour of which you cut the fabric.
The next step is to glue the fabric onto the foam.
The sides of the frame are also better to decorate. To do this, apply glue to the foam.
We apply tape or paper to the sidewall, picking it in color to the main background color.
On the back surface of the resulting picture you need to glue a bracket, hook or eyelet, then to hang it on the wall.
In a similar way, you can make several blocks for one composition.
Please note that the basis for the fabric pattern does not have to be made rectangular. Feel free to experiment with sizes and shapes. For example, you can make such a composition of round and rectangular blocks.
There is one more option: to create a modular picture, having previously cut into parts and pasted on polystyrene foam. For example, as shown in the photo below
Create a voluminous picture Volumetric pictures of fabric are more difficult to create, but they will also look more chic. Here are your secrets: you need to be able to cut and make voluminous figures. To create such a picture, we need a background of cardboard or a sheet of plywood. To add the necessary shades to the background, you may need a paint for the fabric, with the help of which the picture will become more elegant and “expensive”.
And now I present to you a step-by-step instruction for the production of a three-dimensional picture: First attach the fabric to the background, if necessary - color, it depends on your imagination.
The main frame of the three-dimensional figure can be made of ordinary wire. Wrap it with cloth and melt to the picture. As a result, we can create not just a picture from a fabric, but a real work of art. For example, the works of the Australian textile artist Annemieke Maine, which is rightfully considered the founder of a new direction in art, and specifically, textile sculpture, are presented below. Of course, this concept can be considered conditional, the artist’s work will be more correctly called volumetric paintings created in the mixed technique of painting, applique, embroidery.
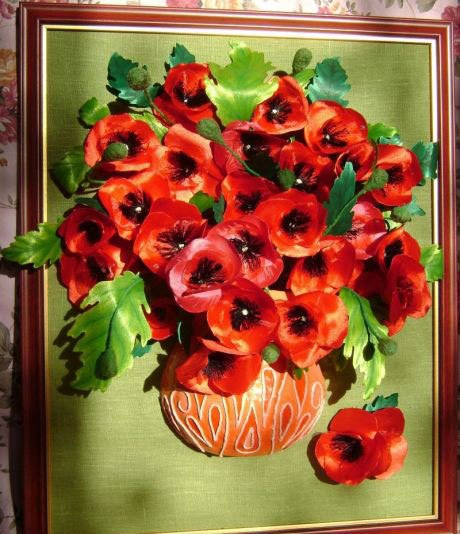
The advantage of voluminous paintings is that you can realize much more of your brilliant ideas. The most popular figures that the three-dimensional picture contains are fabric flowers, painted at your discretion. If you practice longer, you can learn how to make real collages that will look much more “alive” than a simple painted picture. Each owner of an apartment or house wants to express their individuality, including through the decoration of the room in which he lives. Hand-made things will become unique decorations of your interior. For decoration, paintings are often used, but high-quality and beautiful paintings cost a lot of money. But what if, instead of the free space of the walls, one wants to admire a real work of art?
We offer you to pay attention to this type of decor, such as paintings made of fabric. Qualitatively made, they will not only replace classic paintings, but will also be a reflection of your preferences.
At minimal cost, such designer things can look very expensive, of course, if you do not use very cheap fabrics for their manufacture. In stores you can find material with stunning colors and patterns. In addition, paintings made of fabric are quite simple to make, and it does not take much time. Perhaps you will have a talent for their manufacture. In this case, you can sell your works or give to friends and acquaintances for all kinds of holidays.
Moreover, the picture is a universal gift that can be presented to both a woman and a man. And if you know the interior design of the people to whom the original gift is intended, then it will always fit perfectly into the surroundings.
Tools and materialsTo get started, you will need to select the material that you will use for the frame and subframe. They can be made of wood or foam.
The tree is more rigid and the material on it holds better. If you choose a material such as polystyrene for making a painting, then you don’t need a frame at all, since the fabric will simply be pressed into the surface of the polystyrene. Note! Cardboard furniture is the choice of modern people. 88 photos of design ideas
For the manufacture you will need scissors with which you will cut the material. It is desirable that these were special tailor's scissors for fabric. Self-tapping screws, small nails and a hammer, as well as a staple gun and slats for the frame will also be needed.
When choosing material for a future picture, everything is limited by your imagination and the breadth of choice of fabric in stores.
Making a pictureTo begin with, we will make a frame of wooden slats, connecting them with screws. Then proceed to the preparation of the tissue. It should be ironed well. The better this is done, the better the finished picture will look. After all the preparatory work, we proceed directly to the production of the picture itself. Lay the fabric on the wrong side on the table and lay the subframe on top.
Tuck the edges of the material and fasten them with a staple gun.
When performing this operation, pull the fabric well so that wrinkles and swelling do not form. You just have to cut off the rest of the fabric and attach the frame from the outside. The picture is ready!
As already mentioned, a frame is not needed for a picture on polystyrene foam. In this case, the fabric simply adheres to the surface and is cut to the size of the foam. In order to make the picture look finished, it is worth finishing its sides.
On them, you can stick tapes of material or paper in color suitable for the main color of the picture. Do not forget to attach the mount so that you can hang the picture on the wall.
Due to the fact that fabric patterns on foam do not have a frame, they can be made in such a way as to make an integral composition of them.
It can be rhombuses, circles and other shapes. You can also divide a single piece of fabric into separate parts and then make a single picture.
Volumetric paintingsTo create three-dimensional patterns of fabric, you will need a fabric that will play the role of a background. It can be a plain white fabric, which you will dye to suit your color.
Then we cut out the necessary elements of the picture from another fabric and attach them over the background. This can be done in a way convenient for you, for example, to sew or attach with an iron.
The main thing when doing such paintings, so that no seams and other joints are visible.
The frame for such a picture is the same as for ordinary paintings made of fabric. Of course, you will spend much more time and effort on creating a three-dimensional picture, but such a work will look much more spectacular.
Photo of fabric paintings
At the request of the inhabitants of the country, I sketched instructions. The picture is made of a whole sheet of thick paper: drawing paper, drawing, today I used thick paper for a printer in A4 format The task is to perform a scan for a parallelogram, if they took the A4 format, then the sizes will coincide with my samples. I make a marking along the long edges - 1, then 2 cm. I use for marking and ribbing, or rather folding with an awl, it is more delicate than a knife, but you can easily go with a knife!
I retreat from the short side by 12 cm and another 2 for the thickness of the picture, as well as on the sides. She noted and again drew the folding lines. In principle, the frame thickness can be varied, but for A4 - 2cm - maximum
Here we need such a scan, as for a flat box. We remove the excess, leave the reserves for gluing, it seems to shade all the excess ... If you look at the numbers in the photo, then this is the size in mm!
Here is our scan, now we need to outline the picture, and on the other side, which is with reserves! Just flip it ...
Turned over, outlined a "screen" of 1 cm on each side. And fantasize !!! First you need to come up with a plot, make a sketch and, most importantly, figure out what to cut and what to leave ... Hint: with some details you need to “hook” the main character of the composition. For example, I have algae! Unfortunately, sometimes the details fail, do not despair, make inside the "backup". Cut excess with a clerical knife Performing an individual interior design with your own hands has become a very fashionable trend. High-quality items made by hand can add charm to any home. We will tell and show how to make volumetric paintings from fabric with our own hands! Today we’ll talk about cloths. When executed correctly, paintings made of fabric can look on the same level as expensive paintings by artists. But first, let's see why paintings made of fabric have gained such popularity?
Pictures from fabric: favorable price and simple implementationFirst of all, paintings made of fabric are practical. They provide an opportunity to realize a masterpiece with minimal cost. Of course, you should not use cheap fabric if you want the picture to look expensive and not tear during processing. Moreover, manufacturers of good fabrics offer unusually beautiful and interesting prints. Creating such paintings is suitable for beginners. Secondly, fabric paintings are easy to implement. To create you need only patience and a bit of imagination. With frequent practice, you can create pictures in just 2-3 hours.
And thirdly, paintings made of fabric are beautiful. Fashion can change, and individual style and look in interior decoration will always be highly appreciated. Materials and Tools RequiredInitially, we select the material of the frame and subframe. The most common options are polystyrene and wood. Wooden frames are distinguished by the most even surface, the fabric on them keeps excellent due to the rigidity of the tree.
With regards to polystyrene, a frame is still required, since the pictures on the polystyrene are made by pressing the fabric into the surface. So, to create a picture you will need:
3D do-it-yourself fabric patternsVolumetric paintings from fabric are more difficult to create than ordinary ones, but their appearance will be more representative. There are secrets here, you need to be able to make patterns and voluminous figures. To create a picture of such a plan, we need cardboard or plywood. To add the desired shades to the background, you can use paint for the fabric, with which the picture will take on the most elegant look. Below you can find a master class on creating a three-dimensional picture.
3D picture made by handTo create a picture you need to attach the fabric to the background, then attach the main drawing and draw a contour. To do this, you need a burning machine. At the end, cut out the fabric pattern and glue it with an iron. Make a frame for the picture from wire. Wrap her cloth and melt to the picture. To create volume, fill the elements with foam. Make sure that the seams are not visible. As a result, we do not just a picture, but a real work of art. Below you can see the artist’s paintings from Australia. She works with textiles and rightfully is the founder of this type of art, namely textile sculpture.
The main advantage of three-dimensional paintings is that you can realize a much larger number of your ideas. The most popular figures found in volumetric paintings are flowers painted at your discretion. Usually they are most suitable for the interior. Video on the topic of the master classAn indispensable assistant for creating paintings from fabric will be our selection of videos, in which all the secrets and nuances are presented clearly. Happy viewing! |


| Read: |
|---|

New
- Rental cottages for the new year
- Modern design kitchen living room, photo ideas
- The interior of the dining room in the house
- Children's center for the little ones
- Interior studio 30 sq m
- The best design project for a studio apartment
- How to arrange indoor plants
- Small beautiful country houses
- Rent a house for the new year
- The interior of a country house - photo of wonderful design work


